Well, I have started to attempt winestoppers, and I am quickly realizing that it is going to be like the pens all over again - I need to obtain the relevant knowledge, and to learn all of the tricks.
First, I learned that in addition to the "starter's kit" for the winestoppers, I needed a Morse taper and a chuck. The taper goes into the headstock of the lathe (where the pen mandrel went), and the chuck is supposed to go over the taper, and stay there. The problem is that the chuck won't do that - it keeps coming off. I need to figure that out.
Meanwhile, I am back to pens for a bit. I have been commissioned for several pens by some co-workers. I am making a bloodwood click pencil, a cocobolo fountain pen, a cocobolo Classic American pen, and a bloodwood fountain pen. I also need to order some combination pen/pencils, as I have been asked to make one of those as well. I will hopefully have them all done by the time I next go into the office. I turned and sanded and polished the first three pens yesterday, but just in case the assembly of the pens does not turn out well, I wanted to enjoy how the pieces came out on the lathe. :-)
Yesterday (Saturday) was the day when I went to see a demo of the ornament making process that got me into woodturning in the first place. Of course, at the time I took that original class, I knew nothing about woodturning at all, and was not really able to remember all that much of it by the time I had the tools to do it. So, I had been waiting for this demo for a long time. This time, I took some notes and also was able to retain a lot more of what I saw and heard. I also was able to apply some of the principles that I learned to my pen-making later that day.
In addition to the bloodwood fountain pen, I am also making a couple of olivewood click pens that, if they turn out well, could be part of a holiday present.
Last night, while I was making my pens here, my wife was at a chorus event and was then at a potluck dinner with a Yankee Swap. Her gift was the cocobolo Classic American pen that I made a while ago, that came out almost orangeish. It was well received.
My wife and I have been making our holiday wish lists, and there is going to be a lot of woodturning related stuff on mine. It is a win-win situation: I might get some useful stuff to use in woodturning, and for once, I am going to be pretty easy to shop for. :-)
Wednesday, November 28, 2007
Thursday, November 15, 2007
More places to get pen materials, and more people to receive the pens
Let's see...a lot has happened since I wrote here last. Apparently my sister's colleagues really liked the broker pens. We went to Ottawa, specifically to a place called Lee Valley, which would be the store that I would be going to if I lived up there. I spent a bit of money there on some kits and some acrylic and dyed burl blanks that I had not seen at Woodcraft.
I also received a very nice gift from my (let's see, how would this go...) sister-in-law's father-in-law. Otherwise known as my wife's sister's husband's father. He lives in Newfoundland, and I have spoken with him about woodturning in the past. He gave us a few nicely turned lidded boxes a while back. He sent me a package of four large cylinders of dry birch that were cut about 5 years ago. He has already turned them down to cylindrical, which will make things much easier for me when I decide to turn them further.
Two of the click pens that I made from the beautiful piece of cocobolo have now become gifts. Friends of our family are going to get them. Their mother wanted to pay me for them, but these are people I grew up with. No charge for them - it would not be right.
Recent Woodcraft visits have included:
1) a donation of 4 pens that I have turned. This was supposed to be participation in the Turn-a-Thon for the Troops for Veterans' Day, but I was never told (despite asking) what time it was going to happen. It turns out that it was from noon to 2 p.m. only, and we got to the store at about 4:30. So, I donated pens I had already turned, and in return I got 4 kits and 4 blanks, so it was a great deal all around.
2) Getting a new chuck to use for winestoppers. I tried using the chuck and taper combination that I had bought at Woodcraft the last time I had been there, and they did not really fit together well. So, I brought them back and got a chuck that was a better fit. I still have not figured out the whole winestopper thing, but I made my first attempt at it last night, and I may try tonight as well.
3) Returning the large block of purpleheart that I bought a while back to (possibly) make into a lamp. Although I am figuring out, slowly, what to do with purpleheart to perhaps keep it purple, I have not had enough success with it to feel that I should be working with large blocks of it. So, I returned it and got a couple of kits for Wall Street pens (along with the bushings and the drill bit for the Wall Street style). Wall Street pens are interesting - they do not use much wood, but if you get the right wood, they can look really nice. Also, two pens can be made with one normal-sized pen blank.
I will total up the budgetary stuff later. Time to go give the winestopper another shot. At least with these, you do not have to worry about gluing tubes and such.
Tuesday, October 30, 2007
The true start of Shakey le Tree Designs!
Well, yesterday my sister took the 10 broker pens (well, okay, 9, since there was a really nice one that I gave just to her) to give to her colleagues, and they went over really well. For the first time, the pens were accompanied by small cards with the Shakey le Tree Designs logo and an explanation of the wood that was used for the pen. The cards also contained a new email address that I created just for correspondence related to the pens and such: woodturner@swordmoon.com. Now I need to update the Swordmoon site to include a link to some sort of page showing the pens I have made and what I can do.
 OK, well, it is a blurry picture, but I had to put in the logo. The logo itself was beautifully created by my wife.
Shakey le Tree exists! While I have not incorporated, or even copyrighted the name (I am not even sure how to do so), I have cards that go with each of the pens that I have made. Today we gave one to our chiropractor, Dr. Mike. Yesterday, I gave the combination pen/pencil to a co-worker who might be ordering pens for the holidays.
Combined with the fact that I made another really cool pen out of the piece of cocobolo that I recently bought, I am getting really excited about this. While I know that it will never actually MAKE money, it might be something which, down the line, could pay for itself. At least in terms of the materials used to make the pens.
The latest pen:

Saturday, October 27, 2007
Broker Pens, Purpleheart, Cocobolo and other stories
I feel like Rudyard Kipling, with a post title like that, but I cannot write like him, so I will stick to my own style :-)
The broker pens are done! The holly one will probably not be part of the set, but I have ten others that are completed. I learned a lot during the process. In particular, the sanding technique that I learned from the web site I mentioned in an earlier post has worked out REALLY well. I have also learned, through trial and error, how to better use the skew chisel so that I do not get tearout. For posterity, the full cast of characters:

Final tally: 3 cocobolo (1 very striking, 2 pretty cool), 2 Lignum Vitae (1 with the new sanding technique), and one each of: Bloodwood, Osage Orange (mistakenly called Orangeheart in an earlier post), Bubinga, Pink Ivory, and Bocote.
This morning there was an 'event' at Woodcraft, and there was 10% off of everything in the store (20% off of wood!). So, we went down there (we had also gotten a coupon for a free bag of odds and ends from the store) and, well, spent money again. Most of the money was spent on wood (a BEAUTIFUL piece of Cocobolo, two nice pieces of Bloodwood, and a large piece of Honey Mesquite - something that looks like Mahogany and has a cool grain to it.). Some of the money was spent on a chuck for the lathe. It turns out that the wine stopper starter kit does not include a chuck and a Morse Taper (I'll explain what that is as soon as I have used it successfully), but both are needed for working on the wine stoppers (and can be used for other projects like pepper mills and such).
All told, I spent $92.50 on materials which would normally cost $111.63:
Totals:
Out of pocket $242.47, Total: $341.56
All is not lost, though, as I really think that my pen-making skills are improving. I finally made the Olivewood Slimline pen that I cut and drilled ages ago, and it came out pretty well:

I also finally turned the wood from the Purpleheart Click pen that I cut and drilled a while back. Like other efforts with purpleheart, however, the wood is kind of gray-brown after being turned. This time, instead of going forward with the pen, I am going to let the turned pieces sit for a while and see if oxidation helps to restore the purple colour. If not, I am going to return all of my purpleheart blanks, including a large piece that I was hoping to use for a lamp at some point. It just does not seem worth the effort to turn purpleheart, unless I figure something out that is currently eluding me.
After coming back from Woodcraft and turning the Olivewood pen, I cut and drilled four blanks for click pens from the cocobolo that I bought this morning. I have quite a bit of cocobolo already, but this piece is especially cool, both in its reddish colour and its grain. Two people came up to me in the store and said that they had each seen someone different almost buy the piece that I was buying, and one person said that they were thinking of buying it themselves. When you see a piece like this, you just have to get it.
One of the blanks did not make it past the drilling stage, but I drilled and glued the other three, and this afternoon I turned and sanded and polished it, and I think it is one of my best ever:


I could not decide which picture did it justice (neither one does, really), so I included both. It took a lot of effort to line up the grain, since the bottom of the click pen screws into the top half. With a Classic American pen, you can just line up the grain and push the two halves together, but with a click pen you have to screw it in just right if you are making a pen where there is visible grain. A cool part of this too was that the black parts of the pen were not visible until I had turned it. The outside of the wood looked completely different!
As a last picture, here are two Cocobolo bullet-tip pens. One of them I have had for a while, but the other one I finally finished gluing together recently:

The red hue of the Cocobolo is set off nicely by the silver of the bullet-tip kit.
Saturday, October 6, 2007
Adventures in Burlington
Yesterday was my biweekly visit to the regional company office, and as usual I brought my pen collection with me. There was quite a bit of interest in the pens - several people "discovered" them who I guess had not seen them before. I gave a pen to my ex-manager, who has moved on to another position within the company, and he seemed to really appreciate it. He even raised the question of whether we could put the company name/logo on pens to give away at the User Conference! Given that this year's User Conference is in about a month, I said that maybe NEXT year we could do something with that.
Several people mentioned that the pens would make good holiday presents. They asked if I would make some for them, and I said that as long as I had the request in enough time we could work something out.
I brought my co-worker the slimline pencil (bloodwood with a satin pearl kit - it came out really well) that I made for him, and he insisted on paying me $20 for it. So, I get to subtract from the totals for the first time!
Interesting thing about the mechanism for the pencil - the one I got with the kit did not work, so I went down to Woodcraft (I was going there anyway to see a demo on how to turn a pepper mill, which was interesting but involved tools and parts that I do not yet have) and tried a different mechanism from another kit. That one ALSO did not work. It took a couple of tries to find one that did, and then the pencil was complete. I wish I had taken a picture of it before selling it, though.
I have started to use a more thorough process of sanding and polishing, at a lower lathe speed. I got the idea (and most of the instructions) from www.woodturnerruss.com. It is a great site for learning how to get great finishes on woodturning projects.
Meanwhile, the broker pen project is moving along. I have two Lignum Vitae, one Bloodwood, one Cocobolo, one Bocote, one Orangeheart, one Pink Ivory, one Bubinga (that I made a while back), and one Holly (that will probably be sold/given away separately).
Sold: $20
Totals:
Out of pocket $149.93, Total: $229.93
Wednesday, September 26, 2007
Budgetary Concerns
As one may expect, I have not exactly stayed away from Woodcraft just because I have not been blogging. :-)
Recent purchases fall into two categories: upgrades to the workshop environment, and pen materials. I bought a sturdy wooden stand for my drill press, since the existing bench top was not really working. I also bought an assortment of clamps that I had my eye on, since they were $5 off. I bought a woodturning book, and a Pink Ivory pen blank, and two pen kits. The pen kits were a titanium Classic American kit, which is more expensive but may look really nice with bloodwood or acrylic; and a satin pearl slimline pencil kit, which was commissioned by a co-worker who liked the pen that I made a while back and wanted a pencil like it. I also bought a new pen mandrel, since I noticed that the old one was acting a bit warped (more on that later).
Expenses: $91.15
Totals:
Out-of-pocket: $169.93, Total: $229.93
Tuesday, September 25, 2007
Broker Pen Progress
Much has happened since the last post - I have not really been keeping up. Unrelated to pens, I have golfed for the first time and blown the shofar at Rosh Hashanah services (not for the first time, but every time is different). I was struck, as I am every year, at how much the Jewish services revolve around the idea of peace. If only all religions did that (I know that Jews are not the ONLY ones, by any means), can you just imagine what the world could be like?
The broker pen commission has continued, with mixed but mostly positive results. I finally made one from the beautiful piece of cocobolo that I was working from (unsuccessfully up until now). I also made one from holly, which came out fine but was a bit disappointing as to colour (kind of a dull white, and it had a knot which does not really add). My latest attempt was with pink ivory, trying to recapture the magic shade of deep pink that my Classic American pen achieved. Alas, this piece of pink ivory came out well but was not as bright.
I showed the group of existing broker pens to my sister, who liked them all except for the holly and the lignum vitae. I was not too surprised about the holly, but I thought that she would have liked the lignum vitae. So, the list of "commissioned" pens is as follows: Orangeheart, Pink Ivory, Cocobolo, Bocote, Bubinga (one that I made a while back). I am looking to make a bloodwood one and then make a couple more of cocobolo. I *may* try one of purpleheart or padauk. Somehow I need to come up with 10 pens that are different from one another.
Next up: What's going on with the budget? We KNOW there have been other visits to Woodcraft...
Tuesday, September 4, 2007
Hughie, Dewey, and Gluey
Well, the first two broker pens are done, and they came out really well! I turned an orangeheart pen first, to see what it would look like, and it looks pretty cool.

Then I turned a lignum vitae pen, and that came out well too.
All this after turning a pink ivory CA pen that is one of the best I have done in a long time.

I was on a roll!
Then...I started trying to turn the other broker pens. Four in a row have either had the wood split or had the glue come undone between the tube and the blank. I would turn the blanks down, and start to sand them, and would feel that the tube was turning without the wood spinning with it. In a couple of cases, I got to the point where I was about to put the pen together, and the tube would slide a bit.
Luckily, I have noticed, in all cases, BEFORE using the pen kits. The pen kits are the most expensive parts of the process, and it is important to not waste one if it is avoidable. In all of the cases mentioned above, I just cut the wood off of the tube, and sanded most of the glue off of the tube so that it could be re-glued into another blank.
Tonight, I added some glue to the glued-in blanks that I already had made, and I also cut and drilled and glued a few more (one bloodwood, one holly, and three cocobolo that could come out really sharp). THIS time, I used a lot more glue. I am used to having to be very careful about using too much glue because the tube would get stuck in the blanks. This does not seem to be an issue with the broker pens. The tubes are just a bit smaller in relation to the holes that get drilled.
Side note: I canNOT see the appeal in sniffing glue. My eyes get very irritated just having the glue open and nearby for more than a minute or two, even when the garage door is open.
Wednesday, August 29, 2007
Assembly Line Pen turning
The kits for the large group of broker pens came on Monday. Last night, I cut the blanks for all of the pens. Four of Lignum Vitae (green on the outside, but a strange yellowish colour on the inside), four of Orangeheart, three of bloodwood, two of cocobolo, and one of bocote. I do not know if I will use all of the Lignum Vitae or the Orangeheart, but the blocks I had cut easily into four blanks each.
Tonight I drilled the blanks, and a couple of them I will probably not use. Orangeheart is very difficult to drill. It seems like a very soft wood, and it kept getting stuck to the drill bit.
This is my first attempt at this kind of "assembly-line" pen turning. Usually, I will take a pen or two up to the point where the tubes are glued in, then turn them the next time. With this group, I am cutting all of the blanks one night, then drilling them the next, then tomorrow (or soon) I will glue all of the tubes in. I may even turn them all before assembling any of them. I guess, if I am to do many pens on a regular basis, I will have to do it this way, as it is too time-consuming otherwise.
I am very interested to see how the orangeheart and the lignum vitae look after they have been turned.
Thursday, August 23, 2007
Just as I thought to try something other than pens...
Last week I decided to spend my gift certificate and use the "$15 off of $50" coupon, so I went to Woodcraft with the idea of getting the starter kit for winestoppers. Winestoppers start as a cube of wood, and are used to close up wine bottles that have been opened but not finished. They do not use a mandrel, and are not therefore done by spindle turning, so I thought that they might provide a bridge between the world of pens and the world of more "freehand" work such as bowls.
And lamps. Not mentioned thus far in this space is the fact that we are redecorating some of the rooms of our house (slowly). While we were discussing lighting, my wife asked me if I could turn a lamp. I had never thought about doing it, but it seemed like something that would be doable. We spoke to one of the woodturning wizards (Chris, the one who taught us in the bowl class), and he said that he had turned several lamps and that it was (relatively) simple to do.
So, I picked up a couple of practice pieces to try to make into lamps. One of the main issues is how to drill the hole for the cord through the lamp when you do not have a drill press that goes all the way through. I have been reading up on ways to do this, and it is a bit daunting, but very interesting too.
So, I came back with the starter kit for the winestoppers, and some wood to use for winestopper blanks, and some wood to use for practicing the whole lamp thing...and suddenly my sister says to me that she wants me to make several Broker-style pens for members of her team at work. This would involve 10 or 11 pens, so I ordered 15 kits (ever the optimist, I assume that 3-4 of my attempts will be wrecked somehow) from Craft Supplies USA, and they should get here in a few days. After they get here, I will concentrate mainly on the pens until they are done.
THEN I might be able to start on the winestoppers and/or lamps. At which point we'll see some more pictures here, I am pretty sure.
I did finally make a good Classic American pen out of Tulipwood, so I feel a bit better.
Budgetary considerations: Woodcraft - $63.27 ($138.78 total), of which $23.27 ($78.78 total) was out of pocket.
Online ordering of kits: $116.35
Now, I will get back $10 for each pen that I attempt for my sister's team, so that will not be all out of pocket either. So, I will not count that among the Woodcraft expenses. I'll just make a note of it.
Tuesday, August 14, 2007
Still learning...
Tonight I tried another Tulipwood click pen, and while the wood turned out very well, the pen itself did not. I think that I did not pay enough attention to the instructions which tell you to "make a press block" with a hole in it so that the top of the pen can be pressed without damaging the click mechanism. Tonight (unfortunately, after the click mechanism had already been damaged beyond repair) I built a press block. So, the next click pen should go better.
It is really a drag to get the wood sanded and polished, and figure that you are "almost home" with a new pen, only to have the assembly piece not work out. Three pens in a row have done that. Here's hoping the next one works fine.
It is really a drag to get the wood sanded and polished, and figure that you are "almost home" with a new pen, only to have the assembly piece not work out. Three pens in a row have done that. Here's hoping the next one works fine.
Monday, August 13, 2007
It was on the way home!
I went to my regional office today, and of course Woodcraft is on the way home from there. :-) So, I stopped in to return the plastic hose fitting that did not work. That was $3.99 credit, so I bought a Pink Ivory pen blank and an interesting green sparkly acrylic blank, which came to $3.98. However, since I did not count the hose fitting as being out of pocket before, I must count the blanks as being extra. Total out-of-pocket is now $55.51, with $75.51 being the total spent.
Saturday, August 11, 2007
Another trip to Woodcraft
As we were headed that way anyway, and I had something to return (the plastic fitting that was supposed to connect the bandsaw to the ShopVac, but was not the right size), I decided to bring my Classic American bushings in to compare them to a new set, to see if there was any validity to the theory that mine had gotten sanded down.
Turns out I was right! The bushings do get sanded down (I guess you could TRY to avoid sanding the bushings when you sand the wood, but it would be very difficult). I was told that the bushings are good for about 20 pens or so, then they need to be replaced with a new set.
I bought a new set of bushings for $5.99, and traded my plastic hose fitting for another one that they said should work (a $1 difference), AND they had a special on where you could buy a $25 gift certificate for $12.50. I could not refuse that deal, so I bought one. I hope to use it in association with my "Get $15 off if you spend over $50" coupon that is good until the end of August. In essence, I would be able to get $50 worth of stuff for $22.50.
Since the NEW plastic fitting did not work either, I will have to return it, so if I count the actual out-of-pocket expenses today, it was the gift certificate plus the bushings, which comes to $18.49. This brings the out-of-pocket expenses so far to $51.53 (total is $71.53), but of course I now have the $25 gift certificate to use for future purchases.
Learning, always learning...
Well, last night was a very mixed bag. For everything that went right, I had to learn something from something that went wrong. It started with working on a Tulipwood Classic American pen. The pen itself came out pretty well, but even though I paid particular attention to getting the wood flush with the bushings, the end result was not flush with the kit on the upper barrel. I think (I will have to confirm this later) that the bushings themselves have gotten sanded down a bit, so making the wood flush with the bushings will make it slightly below where it should be for the finished product. I have no problem getting a new set of bushings if that is the case. If that is NOT the case, I have no clue what is going on.
While putting together the CA pen, I learned how (for the first time) to use the file that I bought recently. The fit between the upper and lower barrels was very tight (and it is supposed to be fairly loose). The recommended way to handle this is to file down the inside of the upper barrel. I had never done this before, but it worked pretty well when I did it for the first time.
Then I went to work on a Tulipwood click pen. This one was one that I was trying to resurrect, as the tube had gotten stuck in the blank during the gluing process. So, I cut off the tube part that was outside the blank, and glued it into the other side. This seemed to work fine, until the part where I was assembling the pen. I made the bad decision to use the "short tube" part as the part of the upper barrel that was nearest the center. When I pressed a part of the kit into this end of the tube, the short piece of tube came unglued. So, I tried to reglue the tube into the upper barrel, and then press the pen together, and the wood split. So, 1 for 2 so far, for those counting at home.
The tiebreaker would be a cocobolo slimline pen. This pen worked fine all the way to the last part of putting the pen together. At that point (as had happened with an olivewood slimline pen a while back), the glue holding the upper tube inside the upper barrel came loose, and the tube came out. I decided to use the thin fast-acting glue to put the tube back into the barrel, and the tube got stuck halfway in. So, I have a ridiculous-looking approximation of a slimline pen.
1 for 3 on the night, and even the 1 had issues. Hopefully I will be able to come up with some quality work soon.
Thursday, August 9, 2007
Working with Tulipwood
Tonight (and last night) I have been gluing and trimming the pens that I have going, i.e. 2 tulipwood click pens, 2 tulipwood CA pens, and one cocobolo slimline pen. Tulipwood seems to be a very hard wood - the barrel trimmer has a tough time with it. At the same time, it seems to act like cocobolo when I try to glue a tube into it, i.e. getting the tube stuck. One of the tubes got stuck, and I used the band saw to cut the tube and re-glue it into the other end, but I am not convinced that it will come out correctly, since I think it will make the resulting blank too long. Maybe, if I am careful, I can salvage it.
I still have not turned the tulipwood on the lathe, but it looks like it COULD come out very nicely. I will probably make one or more of the pens this weekend.
I still have not turned the tulipwood on the lathe, but it looks like it COULD come out very nicely. I will probably make one or more of the pens this weekend.
Sunday, August 5, 2007
Getting a sense of responsibility?
This evening, on the way home, we stopped by Woodcraft so that I could talk to the folks there about connecting my ShopVac hose to the band saw. Well, okay, it was really so that I could break in my new Woodcraft card (it arrived last week, finally) and use my new $20 coupon. It just so happens that they recently received a shipment of new and different exotic woods, so in addition to the pen kits I was going to buy anyway (and a plastic connector to help with the ShopVac/band saw issue), I bought some pieces of the exotic woods to see what pens would look like when made from them. I bought smallish (about 4 pens' worth each) pieces of:
Lignum Vitae (a dark green, almost mossy-looking wood)
Redheart (the piece varies from light to dark red within a short span)
Tulipwood (Just a funky, reddish-orange wood with neat grain)
Osage orange (even more orange than Padauk)
Blackwood (a pen blank's worth, to see how it turns)
Where does the responsibility kick in? Well, I have decided to keep track, starting August '07, of how much I spend on woodturning. Today's total, which SHOULD keep me from having to buy too much more for a while (I always say that), is $53.04. Only $33.04 out of pocket because of the coupon.
We'll see how much posting about the amounts will pressure me to keep those amounts down. :-)
Monday, July 30, 2007
Sometimes, even with the best intentions...
Well, today was the day. We were away for a week, and I wanted to try to turn the combo broker pen that I have been preparing. Last night, I poured glue on all of the pen so that the wood would have more strength (a tip I got from one of my woodturning books), and today I trimmed the ends of the blank (no problem) and turned and sanded. One thing I noticed while sanding was that the surface, while smooth, was not turning smoothly on the lathe. I could not figure out why, and only when I sanded and polished the blank, and pressed the tip into the tube (unfortunately, once you have pressed one part of the pen together, you have reached the point of no return in terms of reusing the kit), did I notice that the holly wood had come apart from the rest of the pen. So...I pretty much had to give it up. It was an interesting idea, and one that I may come back to at some point, but the first try was a failure.
Saturday, July 21, 2007
Another visit to the office, another pen sold...
I went to my company's office yesterday (as I do every 2-3 weeks), and my one paying customer came through again! I have given away quite a few pens to co-workers, but I have also sold several pens to this one woman who buys them as presents for her family members (mainly). Yesterday, she bought the cocobolo click pen (which came out nicely - I will have to make more of those) and the olivewood click pencil, both as presents for her daughter. If nothing else, she helps me to figure out which styles of pens might be popular.
This afternoon, I also started work on another combination pen. I decided to try a pen with two different woods stacked vertically in the pen blank, rather than horizontally (the way the padauk and purpleheart were glued together). I have no idea if it will work, but I am trying a combination of bloodwood and holly (red and white) in a striped formation. I have cut the pieces, and I have glued them together, and they are currently clamped together while the glue sets. If it works, I should be able to drill the hole in the blank this evening. The final pen, if it comes out, will either celebrate Canada Day or the barber shop. :-)
This afternoon, I also started work on another combination pen. I decided to try a pen with two different woods stacked vertically in the pen blank, rather than horizontally (the way the padauk and purpleheart were glued together). I have no idea if it will work, but I am trying a combination of bloodwood and holly (red and white) in a striped formation. I have cut the pieces, and I have glued them together, and they are currently clamped together while the glue sets. If it works, I should be able to drill the hole in the blank this evening. The final pen, if it comes out, will either celebrate Canada Day or the barber shop. :-)
Friday, July 20, 2007
The combo pen finished
The first truly SLT designed pen has made it through to fruition! It is not easy to capture in a photograph, but you can see where the purpleheart is joined to the padauk at each end:

Now that we have finally finished one of these types of pens, it will be easier to design others. There is a noticeable thinning of the pen in the lower half - this happened, I think, because the padauk is a softer wood than the purpleheart, so the chisel cut deeper into the padauk. As I work more with different woods on the same pen, I will get used to this and the pens should turn out better.
I also made a bloodwood pen last night, to go with the letter opener. That one came out fine:

One issue that I have been running into lately is that the top of the pen is not as flush with the kit (at the middle, where the center band is). I think that this is because I part off the 1/8 inch of wood before sanding down to the bushing. Then, when I do the sanding, I am not as accurate in terms of leaving the wood level with the bushing. I think, next time, I will do the rough sanding before I part off the wood, and see if this makes a difference.
Wednesday, July 18, 2007
Progress of the combination pen
So far, so good...the combination padauk/purpleheart pen made it through the next stage. I was able to trim the barrels without any splitting of the wood. The next stop is the lathe.
Something intriguing in the ongoing mystery of the colour change of purpleheart: Trimming the ends of the blank introduces a lot of heat (via friction) to the wood. It seems that the introduction of that heat deepens the colour of the purple in the wood. It is possible that introducing heat to the blank after it is turned on the lathe (and after sanding, I guess) would deepen the colour on the finished pen.
To test the theory, I may turn a purpleheart-only blank to where it is brownish, and then put it in the microwave or oven to see if I can induce a change.
Tuesday, July 17, 2007
Sharp tools make all the difference
Tonight, before turning the cocobolo ballpoint twist pen (which came out very well), I sharpened the roughing gouge on the wheel and then sharpened my skew chisel on the diamond stone for the first time. What a difference! Using the skew chisel on the cocobolo was amazing. It cut so easily and so smoothly...I think it is more than ever my favourite tool.
Here is the pen I made tonight:

Another first-time experience: I had heard that when you drill out a pen blank, you should put a block of wood under the blank so that the blank does not split as the drill bit comes out the bottom. I had never run into this issue, so I did not think much of it...until tonight. I was drilling out the bloodwood blank that I had cut earlier in the evening, and the blank split because I drilled it too fast and there was no piece of wood under the blank.
Of course, now that I have a band saw, it was a matter of about 5 minutes before I had another bloodwood blank to drill. This one I drilled much more slowly, and it worked a lot better. I still (full disclosure) did not put a piece of wood under the blank, but I think that the slow drilling helped a lot. If there is a need to drill quickly, I should put the block of wood under the blank, I guess.
I decided to try the bullet tip pen again. I have tried two of them, and they both came out well in their own way. Hopefully the third one will come out VERY well. I will be using cocobolo for it.
Another shot at the designed pens
In addition to cutting a pen blank out of bloodwood, for a Classic American pen that will complement the letter opener that I made a while back, I am making another attempt at a pen that my wife designed. This will be a Classic American pen too, but it will have purpleheart at the top and bottom and padauk in the middle. If all goes well (the last such attempt did not make it past the drilling stage), it will be a neat orange and purple pen. Well, orange and brown until we find out exactly how purpleheart actually turns purple again.
[Edited later at 8:33 p.m.]
Well, the padauk/purpleheart pen passed the next stage. The glue held, and I was able to drill through the components of the blanks without any splits or tearout. I also drilled and glued the tubes, so the next step is to see if I can trim the barrels and turn the pen.
[Edited later at 8:33 p.m.]
Well, the padauk/purpleheart pen passed the next stage. The glue held, and I was able to drill through the components of the blanks without any splits or tearout. I also drilled and glued the tubes, so the next step is to see if I can trim the barrels and turn the pen.
Three successes!
Last night I made my first fountain pen! Made from padauk, it came out really well (I am using the picture of the open pen as the background to my title at the top of the blog):

I also made an Olivewood click pencil. This one looks a lot like the Olivewood click pen that I made a while back, but unlike that one, this one actually works. Some nice grain in this one, even though my photography does not do it justice:

Here is the Classic American click pen that I made over the weekend. It looks a lot like the other Classic American pens (the ones that twist), but on this one you press the top to get the point of the pen out:

The interesting thing about that one is that I used the new reddish piece of cocobolo for it, and yet it came out brown (with interesting grain, but still...). Just goes to show that you can never really tell what the inside of a piece of wood is going to be like, in terms of colour. You can tell what the grain will be like, but that is it.
Sunday, July 15, 2007
Catching up on the week
I was in Toronto last Tuesday and Wednesday, and not feeling well on Thursday, so I did not really get to do anything related to pen turning until the weekend.
Friday I sharpened the barrel trimmer on the diamond stone, and that worked pretty well. No more tearout (so far) from the barrel trimming.
Saturday, I went to a demo on dust collection at the Woodcraft store. Most of the discussion revolved around how to do dust collection efficiently in woodshops that are considerably larger than mine, but it was interesting nonetheless. I DID learn that what I am doing in my shop (wearing a respirator, using the shopvac to clean up) is basically what I should be doing, based on the machines I am using and the layout of the shop. That was a relief - I want to stay safe (no wood dust in the lungs and such), but I did not want to shell out for a dust collection system at this point.
After the demo, I hung around the store for a bit, and bought some reddish Cocobolo wood. I found out that you can get smaller pieces of the various wood types, instead of having to buy the entire piece that the store has along the wall. As long as you leave them at least 4 feet of wood, you can take a smaller piece. This is great - it will enable me to try different woods for my pens without making major purchases.
On the way out, I got into a discussion (not the first time) about purpleheart with the people on the staff. They seem to think that once purpleheart turns brown, it cannot turn back to purple. This is contrary to my own experience, so basically I am convinced that no one knows what to do to make sure that the finished product comes out purple.
I worked on a few different pens yesterday and today:
1. A cocobolo Classic American click pen - I cut and drilled and glued this one yesterday, and made it this morning. It looks like the other Classic American style pens, but drilling and turning it is a lot different because the tubes for the two halves of the blanks are actually different sizes. Instead of twisting, the pen clicks. It came out pretty well, and my wife says that she may prefer this style to the Classic American twist pen.
2. A padauk Classic American fountain pen - I cut and drilled and glued this one yesterday, and trimmed the barrel today. I will probably make the pen tomorrow night when my wife is at her choral group practice. This was made from a blank that my wife said looks almost like a sunset (padauk is basically orange).
3. An olivewood click pencil - the counterpart to the olivewood click pen that I made (the one that looked fine but was inoperable because I messed with it). This one had already been drilled and glued. I just trimmed the barrel, and I may work on making that one tomorrow night too.
4. A cocobolo click pen - This one I cut and drilled, but I am not going to glue it yet. I was advised by my guru at Woodcraft to drill cocbolo twice if the tube is a tight fit the first time. Let the wood dry out and shrink, and then drill it again. So, I will drill it again tomorrow night, and then glue it to work on later.
My brother told me that his co-workers really like the pens, and that they may want some for themselves. Not holding my breath, but that would be pretty cool. I gave him the two online sites that I use for kits, and figure that they can pick one out if they want, as long as they understand that the price goes up a bit if it is not a kit that I have already or can get in bulk.
Sunday, July 8, 2007
Two more pen kits, please...
So today I went to Woodcraft (big surprise there) and got the bushings and a kit for the Classic American Fountain Pen. I also got another kit for the regular click pen, so I can try it out with cocobolo or bloodwood.
I also asked how to sharpen the pen mill (barrel trimmer). It seems that I can do that on the diamond stone sharpener that I bought for the skew chisel, so I am going to give that a try.
I also asked how to sharpen the pen mill (barrel trimmer). It seems that I can do that on the diamond stone sharpener that I bought for the skew chisel, so I am going to give that a try.
Saturday, July 7, 2007
Another giveaway, and another commission
It is a good thing I saved a picture of the latest acrylic pen for posterity, because we got together with a friend of mine from Chicago today (she was in New Hampshire) and she really liked it, so I gave it to her. I have no problem with doing that if the person is likely to use the pen themselves.
My friend also gave me a commission - her husband (also a good friend of mine) collects fountain pens. I have never turned a fountain pen, but now I have a reason to. Since he reads this blog occasionally (or so I have heard), I will post my attempts at fountain pens here, and he can see if there are any that he might like.
A bit of a bummer regarding the first team-designed pen: The gluing went fine, as did the cutting of the blank, but the drilling resulted in a split of the cocobolo wood at one end. While the resulting cocobolo/ash combo blank is viable, I think I will waste the wood rather than waste a kit seeing if I can make the pen. Back to the drawing board for us. My wife had some other ideas for combination-wood pens, though, so it should not be too long before we try another one.
A visit to the office, two visits to Woodcraft, some success, some failure
Last night I went to Woodcraft and bought the bushings and a kit for a Classic American "click" pen, which is different from the twist pens that I have been making. Unfortunately, I did not realize that the "click" pen requires a different drill bit as well (11 mm), and I had to go back tonight on my way home to get that. I also applied for a Woodcraft Visa card (about time - I should have done that ages ago!) and picked up the kits and bushings for a regular ball-point click pen - not Classic American style.
Last night, after getting home, I made a Bocote Classic American pen that came out pretty well. It is the same wood that I used for my brother's pen and pencil set.
Today, I went to my company's office in Burlington and brought my pens with me (as I always do). I ended up giving away a pen that I thought no one would want - a pen/pencil combo that was made from two woods (Redheart on top and Cocobolo on the bottom). I always kind of liked that one, but I never thought that anyone else would. One of my co-workers really liked it, so I gave it to him. He wanted to pay me, but I stuck to my "free to friends, sold to friends who want to give it as a gift to someone else" policy. He wanted to use it himself, so it was free.
Tonight I tried to make two pens. I used Olivewood to try to make the regular click ballpoint pen, and it did not come out quite right, so I tried to fix it and ended up breaking the mechanism. So, it looks good but does not operate. The look of it is such that I may make more in that style, though, and I can show it to people as a prototype as long as they do not try to write with it:

The second pen was an acrylic that was the most expensive pen (in terms of materials) that I have made so far. The kit was platinum instead of gold (my wife picked out the acrylic and the kit to go together), and went nicely with the black, white, and red of the acrylic. The sanding was not a perfect job. It falls just short of my last attempt with acrylics in terms of the look and feel of it. I could probably sell it, but we'll have to see:

The first "team-designed" pen was glued together tonight as well. My wife designed a pen that is part cocobolo and part ash. We cut the pieces and glued them together, and tomorrow we will (hopefully) cut and drill the resulting blanks, and then glue the tubes. If THAT goes well, we will later make the pen. The first combo experiment! I am excited, but a bit nervous about the process, as it is the first time.
Wednesday, July 4, 2007
My first commission, and a design partner
Today, at our July 4th gathering, I received my first commission for a particular type of pen. A friend of our family, seeing the different types of pens that I can create, requested a click-pen made out of cocobolo. I have not yet done any pens made from kits for click pens (as opposed to the slimline and CA pens, which twist to open and close), so I will have to look when I next go to Woodcraft to see what kits they may have. My wife may pick out the acrylic blank for her requested pen, as well. I will also be on the lookout for the blue wood or acrylic, as stated earlier. I am still feeling patriotic, and I still think that a red, white, and blue segmented pen could be fun.
On the way back home tonight, my wife commented that it might be fun to design some pens together, which I think is a very cool idea. I have many different types of pens to attempt, and I think it would be great to have her come up with some design ideas for combination (more than one type of wood/acrylic/colour) pens of various styles. That way, the finished product could be the result of teamwork.
With the latest success with acrylic, and the way it was received, I may attempt to do more with them. We will have to see.
The secret is out
Yesterday, we had a great visit from my brother and his girlfriend, and at long last my brother was made aware of what I have been doing these last several months. It was kind of fun to wait until I had some real successes to show him, and to keep him in the dark until now. He seemed to like the Bocote pen/pencil set, and also seemed kinda surprised that his little brother could be doing all of this stuff with machine tools. His girlfriend seemed to like her pen too (the Olivewood pen with the organic citrus wood polish). All in all, a good time was had.
Today I will present the acrylic pen to the hostess of our July 4th gathering. That should be fun too. This weekend, I will make more of the olivewood pens and maybe a bloodwood Classic American. I need to think of what kind of pens I will make next. Maybe more slimlines and regular CA pens...or maybe I will try a segmented pen of some kind. If I can find a blue wood (or even a blue acrylic, though it would be harder to work with), I could combine it with bloodwood and holly to make a red, white and blue pen. That might be cool.
Today I will present the acrylic pen to the hostess of our July 4th gathering. That should be fun too. This weekend, I will make more of the olivewood pens and maybe a bloodwood Classic American. I need to think of what kind of pens I will make next. Maybe more slimlines and regular CA pens...or maybe I will try a segmented pen of some kind. If I can find a blue wood (or even a blue acrylic, though it would be harder to work with), I could combine it with bloodwood and holly to make a red, white and blue pen. That might be cool.
Tuesday, July 3, 2007
Fixing the inoperable pen, and some thoughts on cleaning the lathe
At my wife's suggestion, I tried re-gluing the tube into the top of the olivewood pen that had come unglued. It worked, after a fashion. The tube was, strangely, a bit long for the blank anyway, so while the pen now works, it does not QUITE fit together at the middle. Not an unqualified success, but better than it was. Another "office pen", I suppose. One that I can use, but maybe not one I can give away...and definitely not one that I can sell.
The wet sanding that I did yesterday left some residue on the lathe. I am not quite sure what the best technique is to clean it. I looked it up online, and people seem to use kerosene or WD40 to clean the lathe, but I think they are more talking about the moving parts and such. I may try WD40 and a rag just to see how well it works.
The wet sanding that I did yesterday left some residue on the lathe. I am not quite sure what the best technique is to clean it. I looked it up online, and people seem to use kerosene or WD40 to clean the lathe, but I think they are more talking about the moving parts and such. I may try WD40 and a rag just to see how well it works.
Monday, July 2, 2007
Acrylics, Part Deux
So, in need of additional inventory (read: I needed to make at least one more pen, as a gift for a friend on the 4th of July), I decided to finally attack the acrylic pen blank that I long ago cut and drilled. I looked up some tips on how to deal with acrylics, and people seemed to think that wet sanding the acrylics and using light pressure when sanding would make a lot of difference. For one thing, the wet sanding and the lack of pressure would keep heat from building up, and heat is the #1 thing to look out for when working with acrylics, since the plastic can bubble up and rip. This is what happened with my first try with acrylics.
I turned the pen differently this time around. I used much more of the roughing gouge, and a lot less of the skew chisel. With wood, the skew chisel can save a lot of time and effort. With acrylics, the skew chisel creates spinning loops of plastic that then have to be removed from the lathe.
Then came the sanding: I had never done any wet sanding before. I looked up how to do it, and the instructions seemed fairly simple: Fill a small bowl with water, and put a couple of drops of dish detergent in it. Then dip the sandpaper in the water before using it on the acrylic. I wet-sanded for the 150 grit and the 320 grit, and the results seemed to be a lot better than my first try. What was coming off on the sandpaper was a kind of mud (a slurry would be the technical term, I suppose), and the heat was not building up. The wet sanding took a lot longer due to the lighter pressure, but it seemed to be worth it. I even wet-sanded for the first piece of MicroMesh (1500 grit), but after that I figured light dry-sanding would work just as well.
And it did! I finished with the MicroMesh and polish, and put together the pen:

I am using the picture with the flash, since it shows better the shiny aspects of the pen. I think this will be a cool addition to my inventory, if only for a couple of days. Of course, once my wife saw this one, she said that she wanted a red one. So, I guess my days of working with acrylics are not over.
This one seemed less of a pain to do, but I still think I enjoy working with the wood more.
One thing about Olivewood...
Though it looks really nice, and turns really well...the waxy surface means that it does not adhere very well. On my second try at an Olivewood slimline pen, I created a nice-looking pen that is completely non-functional because the brass tube inside the top of the pen came unglued (as I almost did, when I saw it). So, you can twist the top of the pen all you want, but the pen will not work.
*sigh*
Well, if all of my attempts were perfect, I would have nothing to write about.
*sigh*
Well, if all of my attempts were perfect, I would have nothing to write about.
More things to solve, and using a different polish
Well, after a week away, I finally returned to the pen blanks that I had cut and drilled before my trip. I keep forgetting how long it takes to trim the barrels of several pen blanks before getting them to the lathe. As an added wrinkle, today I had some tearout in one of the olivewood blanks when I was trimming it. I am not sure if it was because the blank itself was small (little room for error) or the barrel trimmer was dull (I probably do need to sharpen it) or the wood itself was weak. Following a tip from one of my books, I took the piece that came off, pressed it into place (a wood with grain helps with this, as you can see how the wood aligns), and applied thin CA glue to the whole area. Hopefully, the piece will stay put now, and when the glue dries, the wood will be stronger and I can finish the trimming and make the pen. I like it when I can salvage pens even when something goes wrong. The pencil I made for my wife, which came out REALLY well, was initially an instance where the tube got stuck on its way into the blank. Doubly satisfying.
My brother and his girlfriend are coming to visit tomorrow, so I finally get to show him the present I made. His girlfriend is EXTREMELY chemically sensitive, so when I was at the grocery store today, I picked up some organic citrus wood/furniture polish. I thought that I could make a slimline pen for her, and use that polish in case the other polish would cause problems.
I made the pen without too much of a problem, but one thing I did NOT realize is that the organic polish takes a VERY long time to dry. I am used to the Myland's polish, which dries very quickly. As a result, I was putting the pen together while it was still wet. I think it still came out okay, though. I just need to watch that if I polish other stuff with that same polish.

Speaking of pens and such made for specific people, I finally got to give the magnifying glass to my father-in-law last weekend. That was cool - he really appreciated it. I also gave my mother-in-law a cocobolo pen that I had made a while back, which had come out really well.
Thursday, June 21, 2007
Cutting some more blanks, and what to do about Holly?
Yesterday I cut some more blanks to use with my batch of pen kits. I cut a bloodwood blank to make a Classic American pen with, to go with the letter opener that my wife is giving to her co-worker as a present. My last attempt at this ended up with tearout, so we cannot give it away as a present.
I also cut a piece of Olivewood into three blanks to be used for slimline pens. I made a Classic American pen out of Olivewood that came out very well a while back (ended up as a gift to a co-worker of mine), so I decided to make some more pens with it. The piece of Olivewood that I am using for the pens is a large piece that was on the $1 discount table at WoodCraft. I should be able to make at least 8 pens with it, so I am way ahead on the deal (pen blanks that you buy are usually $1 per blank and up), assuming that the pens come out well.
I also cut some Bocote for use as Classic American pens. I did not cut any Cocobolo yesterday, though I may do so soon. I kind of want to see what happens when I make a Classic American pen and a slimline pen out of the same wood (Bocote or Cocobolo or Olivewood or Bloodwood), just to get an idea about which woods work better with which sized pens.
I only drilled and glued the bloodwood yesterday, but Saturday I will turn the Bloodwood and maybe (if I get inspired) the purple Acrylic pen that has been drilled and glued ever since that fateful day when I first tried to make an acrylic pen. I will also drill and glue the other blanks, and maybe (depending on how long I am at it) I will get to turn some of those as well. We will be away for much of the next week, and I think I will miss the turning, so I want to get a bunch of it in before we go. My wife is singing with her choral group at a wedding on Saturday, so I should have some time if I want it.
I picked up a large piece of holly wood at Woodcraft, with the idea of perhaps using the holly as the wood for the white pieces of a chess set. I want to turn a couple of pens with it, but the wood is REALLY white with no grain lines to speak of. This may work well for the chess set, but a pen would probably look really boring. So, I need to find another use (maybe a magnifier, or maybe as accents in a composite pen?), or keep it on the shelf until I actually decide to make the chess set. I still need to decide on a dark wood for the black pieces of the chess set, too.
I have seen online that you can clean MicroMesh with a brush that has bristles on it. I think I might recycle my old grill-cleaning brush as a sandpaper-cleaning brush if it works. I'll give it a shot on Saturday.
Monday, June 18, 2007
Sharpening changes, and a trip to the office
Today I went in to my office in Burlington, MA. One of the (many) things I did while I was there was to show my new pens to the co-workers who visited the office where I was sitting. I also gave my old boss the pen that I made for him (as thanks for the tip he gave me about the plumbing issue I was having), and gave my office-mate the cocobolo slimline pencil that I made.
On the way home from work, I stopped in at Woodcraft (big surprise there). I brought the skew jig that I had recently bought from there, and the skew chisel that I tried to sharpen it with (with VERY limited success). I intended to ask one of the people there to show me how to correctly use the skew jig with the sharpening system so that I could correctly sharpen the skew chisel at home. The person I asked to do this was Chris, the 18-year-old who taught the bowl-turning class that my wife and I took last month. He sharpened the chisel for me, taking a lot of his time to do it (for which I was very grateful), but instead of my trying to sharpen it myself using the skew jig, I traded in the skew jig for a diamond stone. A diamond stone allows for hand sharpening of the skew chisel, and also allows for more of a margin of error. Chris showed me how to use it, and also told me that he and his father ALWAYS use the diamond stone to sharpen the skew chisels because of the difficulty of doing it on the sharpening system.
I also got to show the folks at Woodcraft the PenPal 1000, a creation of my wife's that allows me to carry my pens (and magnifiers and such) around with me in style:
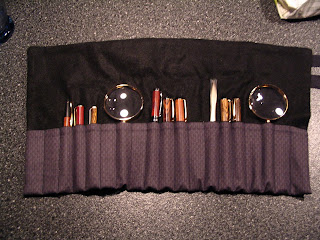
When closed, it looks like this:
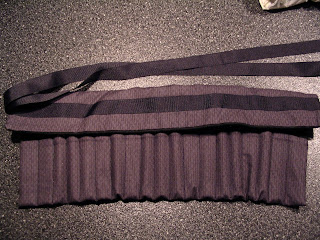
When wrapped up as a carrying case, it is very easy to bring around with me:
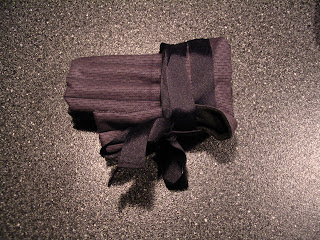
It's an excellent present, and I am very grateful for it. Now that I have a sharp skew chisel, I can start making new things for it. I think the next thing will be the bloodwood pen to match the letter opener, but I have some ideas for projects after that one.
Wednesday, June 13, 2007
The tears that come from tearout...and some sharpening tips
Though I had heard quite a bit about the dangers of tearout when using a skew chisel (tearout happens when you do not get a clean cut when turning, and a chunk of the wood comes out instead of shavings), I had not personally experienced it in a way that was detrimental to my craft...until today. I made a Bullet Tip Pen (which, aside from the tearout, actually came out quite well) and a Classic American Pencil (ditto) out of bloodwood. In both cases, the item was nice and smooth and had a great finish...except for small tears in the wood that were too deep to sand out. So, I have a pen and pencil that I can use, but cannot really give away or sell.
My next step is to sharpen my tools again. In order to do this, I need to set up the other side of the jig that is on my sharpening system. The sharpening system has two wheels - one rough, one fine. The rough one is for setting the edge on a tool, but it removes a lot of steel if you use it all the time for sharpening (which I have, up to now). The fine one is to keep tools sharp. I need to set up the jig on the fine side, so that I can sharpen the skew chisel and the roughing gouge, and avoid tearout in the future.
I also need to buy another Classic American kit (or 10), as I promised my wife that I would make her friend a letter opener (already made) with a matching CA style pen or pencil. The pencil today would have been perfect...except for the tearout. I will try to get a good picture of the tearout, but it may be tough to get on camera. Unfortunately, that does not mean that the tearout cannot be noticed with the naked eye.
Luckily, I have a lot more bloodwood to work with, once my tools are sharp again.
Tuesday, June 12, 2007
Working with bloodwood again
Today I made the magnifier and letter opener from the bloodwood blanks and tubes that I drilled and glued yesterday. I did have to trim down the tubes that were sticking out of the blanks, but as I noted in my last post, this just made the whole thing a bit shorter - it did not keep parts from fitting together, as it would if it happened with a pen kit that had two pieces.
The items came out pretty well:
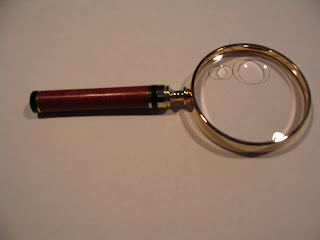
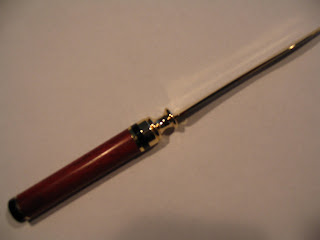
For some reason, the letter opener would not lay flat when I was taking its picture, which is why we get the knife-edge kind of photo.
Tomorrow, or later in the week, I will tackle the bullet tip pen. It may be easier to make the tenon with bloodwood than it was with cocobolo, as bloodwood is a harder wood, but I am not sure.
As I am making more gifts (and things to potentially sell), I am spending more time gluing pieces. For instance, the pieces of the kits that are pressed on to either end of the handles of the magnifier and opener are fairly loose. When I first started this process, I would not care so much, but now I am gluing the pieces on so that they stay put. All part of the learning curve, and of having pride in the work, I suppose. :-)
Monday, June 11, 2007
A small tip about drilling
Today I cut some bloodwood on the band saw, and I will try to make a magnifying glass, a letter opener, a Classic American pencil and a Bullet Tip Americana pen out of the blanks. I still ran into a bit of trouble with the magnifier and letter opener blanks. The tubes got stuck a bit. However, this is less of a problem than it would be with a pen blank, as I can shave off the ends of the tube and just end up with a shorter handle on the magnifier or opener. I might not even have to do that - if the kits call for parting off some of the wood, I can just make it so that the part that is already out of the blank is the part that has been parted off. We'll have to see.
I did figure out that, with bloodwood at least, drilling quickly is the answer to some of the drilling issues. When I drilled through the blank quickly, the tubes fit more easily into the holes. We'll have to see if that holds with other woods as well. If that could be the answer to the cocobolo drilling nightmare, I would be very happy.
Of course, even with drilling quickly, I got a tube stuck in one of the blanks, as stated earlier (one of them I drilled slowly, so that does not count), so there may be a bit more of a learning curve.
Another tip I learned a little while ago, that I made use of again today: Thin latex gloves help with the gluing process. I do not get glue all over my hands any more.
Hopefully soon there will be pictures of bloodwood crafts to post. I am a bit scared of the bullet tip pen. The turning process includes parting a tenon in one of the halves of the pen, and also the top part of the pen does not get evenly turned. The very top of the pen is thinner than the part near the middle, so there is a gradual thickening. I messed this up the first time I put one of these together.
Yesterday I bought 10 slimline kits, like the one that I made with cocobolo. If you buy them in packs of 10 you get a discount. So, I may be making a lot more slimlines. Not a big deal now that I can cut the blanks myself, so I do not lose as much wood in the turning process.
Friday, June 8, 2007
Making slimlines again...
Though my very first pen was a slimline (they are easiest to make, as the halves are interchangeable), I have been avoiding making them because it seems that you lose a lot of wood in the process. If you start with a store-bought pen blank, what you are left with when the slimline pen is made (percentagewise) is not a lot. Most of the blank ends up as shavings on the floor of the woodshop.
However, now that I am cutting my OWN blanks, I can cut them smaller if I know that I am making a slimline pen from them. Conversely, if I cut the blanks badly for a bigger style of pen, I can use the badly-cut blanks for slimline pens.
Cases in point are the two slimlines (one pen, one pencil) I made tonight. The kits were ones that I bought at Woodcraft back when I thought I would be making a lot of slimline pens. The first is made from Bocote, and the kit is a Satin Pearl slimline kit. The wood and the kit do not go together very well:

The second was an American Slimline Pencil kit that I made with cocobolo wood. This one came out very well. I may get more of these type of kit:
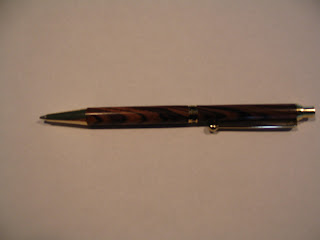
The lesson, as always: Don't throw anything away. Most things that are not useful for one project will come in handy for another one.
Wednesday, June 6, 2007
My own pen blanks!
The whole process is coming together. With the band saw, I can now take large pieces of wood and create my own pen blanks. There was a bit of trial and error here, too. Strangely enough, I learned that using the miter gauge on the band saw was not the way to go. Drawing lines on the wood and using those as a guide worked MUCH better than trusting that the wood was being cut straight just because I was using a miter gauge. The miter gauge helped when I cut a large piece off of an even larger piece of wood, but did not help so much when needing precision.
I also might have solved one of my gluing issues, though it may be too early to tell. I think I was putting too much glue on the tube before inserting it into the blank. I had forgotten that the process of putting the tube into the blank involves twisting the tube in order to spread the glue around, so I did not need to put glue all over the tube before inserting it. On the set of pen blanks that I just drilled and glued, I used a lot less glue and the tubes went nicely into the blanks. Of course, the real test is to see if the tubes stay glued when I do the barrel trimming and the turning. Stay tuned...
My last two Classic American pens, made from the large piece of cocobolo wood that I bought at Woodcraft, came out really well. I think I might be getting the hang of this!
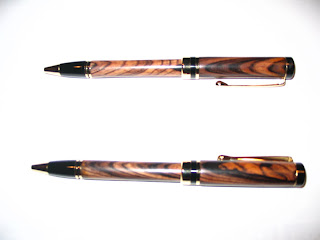
I used the picture with the flash to show the grain of the wood and the polish of the pens.
I made some Bocote pen blanks last night, and drilled and glued them for a matching pen/pencil set that I hope to turn over the next couple of days. I also set up to turn a couple of slimlines - one pen, one pencil - which I have not done since the very first pen that I turned in my own woodshop.
Sunday, June 3, 2007
Cooking cocobolo, or: Still a couple of bugs in the system
As mentioned earlier, there is a type of wood that seems to be VERY difficult to drill and glue correctly. Cocobolo is a fantastic-looking wood, and it is very easy to turn, but it is also a wet wood (a lot of moisture in it), and for that reason, drilling it is a pain in the neck. The moistness of the wood means that when it is drilled, the drill bit heats up the interior of the wood (around the hole being drilled), and the hole shrinks after it is drilled. So, even though the drill bit can go through the wood with no problem, the brass tubes do not fit into the resulting holes. It is almost a paradox, and is very frustrating. None of the tips mentioned earlier work well to fix this problem.
My guru at Woodcraft suggested microwaving the pen blanks for 30 seconds at a time, multiple times (letting them cool in between). I have tried this, with no success. I have also tried drilling slightly larger-than-usual holes, and using the gap-filling glue. This sometimes works, and sometimes results in the tube coming out of the blank during the barrel-trimming process (since the tube did not really bond to the inside of the blank). Again, somewhat frustrating.
The latest piece of advice that I have received, which I have not yet tried, is to drill the holes and then let the blanks dry in the woodshop for a week, and then redrill the holes. I suppose that this COULD work, but I am not holding out high hopes for it. Luckily, I have the Bocote and the bloodwood to work on while the cocobolo dries.
The band saw - last piece of the puzzle?
As I have become more comfortable with power tools, I have gradually accumulated a tool that will help with each part of the process. There is the lathe, of course, which started this whole hobby going. Then there is the grinder for sharpening my tools, and the drill press for drilling out the holes.
For cutting my wood, though, I was relying on a pretty cheap miter saw kit that I bought at the Woodcraft store. The kit consisted of a small miter saw and a small miter box. The box I glued to a piece of wood that I could clamp to the workbench. This setup was barely adequate for cutting pen blanks, and even then the box was so cheap that the saw cut into it, widening the miter slots and making them less useful. As a result, my cuts were not right angles - not a HUGE deal when cutting pen blanks, but not great either.
This solution also meant that I was restricted to starting the pen making process with pre-cut pen blanks and other small pieces of wood, as I could not put any large pieces of wood into the small miter box. In order to take advantage of the savings that could be had by purchasing larger pieces of wood and cutting them myself, I would need a solution that could make more accurate cuts and cut larger pieces of wood.
Enter the band saw. The band saw can cut larger pieces of wood into pen-blank size pieces, and can also cut some of the scrap wood that I have collected to practice spindle turning with. It can also cut smaller bowl blanks when I start to do bowls (if that ever happens).
So, while I still need to extend the miter fence with a piece of scrap wood, I can (and indeed have) cut a larger piece of cocobolo wood into pen blanks. I also have a large piece of bocote and a large piece of bloodwood to use. Once I extend the miter fence, the only thing that is stopping me from churning out nifty-looking pens is my supply of pen kits. I have quite a few, but I will start ordering them in bulk to save money, since I have everything else in place.
Friday, June 1, 2007
Woodturning bowls...similar, yet different
For my birthday, my wife got me a gift certificate to Woodcraft (see "Easier to shop for", an earlier post...it is already reaping dividends!). I decided to use some of the money to take a "bowl-turning" class. Bowl-turning is still woodturning on a lathe, but the similarity between it and spindle turning pretty much ends there. Spindle turning (which is a broader category that encompasses pen turning and other woodturning that is "between centers") results in long, thin, cylindrical crafts. Bowl turning uses different gouges and scrapers (not used for pens at all), and is done by taking a basically square bowl blank, rounding the outside with the inside piece screwed into a chuck on the headstock of the lathe, and then hollowing out the inside while the bottom is attached to the headstock. If you are confused, don't worry. You are not alone.
It was a pretty cool class, and we learned a lot, but because the bowl turning is SO different from the pen turning, I have decided to try and master the spindle turning basics (at least) before attempting to do another bowl class, or attempting to do a bowl in my woodshop. I have already spent so much money on this hobby that I do not want to shell out for MORE tools, and there are several that I would need to start bowl turning at home.
For those of you that are curious...here are the first Meltzer-turned bowls. My wife's is the larger one on the right - I shaved off too much wood before I started shaping the bowl:
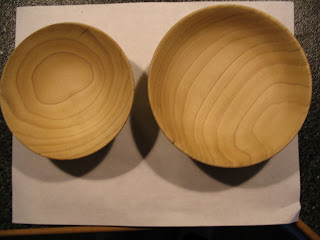
The cool thing is that these are made from a relatively cheap wood - poplar - and yet, because of the grain, they look pretty good. As I have seen with the pens, cheap wood (money-wise) can result in a good piece of work.
Sunday, May 27, 2007
Trying new materials - acrylics are evil!
Some of the pen blanks that you can get for turning on a lathe are not made of wood. There are some very cool-looking blanks that are made of other materials, like corian or acrylics. With these materials, you can get kind of a space-age look and a very shiny pen. As part of my attempt to try different things, I decided to try working with acrylics.
I chose a shiny purple acrylic pen blank with black lines running through it. Knowing that my family likes purple (the discussion of purpleheart woodturning will be addressed later), I figured that the finished product would probably make a good gift.
The cutting of the acrylic pen blank was very similar to the experience of cutting wood. Before getting started with the process, I called Woodcraft to see if I should be using any different materials or different tools when dealing with acrylics. They said that the only difference would be that acrylics are harder on the tools than wood, and that I should leave more room for sanding the blank down. Oh, and I should not sand too much in the same place, as there can be a heat buildup which can create bubbles and holes in the finished product.
Drilling the acrylics was a bit of a strange experience. The hole went straight through the blank - better than wood because there is no grain to throw off the drill bit - but instead of wood shavings flying off, these long curly pieces of plastic worked their way up the drill bit and had to be removed by hand. These plastic pieces were harsh to the touch, and were a harbinger of the struggle to come.
Gluing the tubes into the blanks was not a hardship. I just needed to make sure that there was enough glue on the tube.
Trimming the blanks with the barrel trimmer was a lot like drilling the holes in the first place. Again, instead of wood shavings flying off, the ropes of plastic climbed up the barrel trimmer and had to be removed. All the while, there was kind of a nasty plastic smell. I had to make sure to keep the garage door open while I worked with this material.
Turning the blanks on the lathe was not very enjoyable. The tools had to be VERY sharp, and the nasty smell was everywhere, and the little pieces of plastic flew off around the woodshop. I kept telling myself that I was just doing this to try something new, and that the finished product might make it all worthwhile.
As was recommended, I left a bit more than usual on the blank when I started sanding it down. I thought that I needed to do this because it would sand faster or something, but the opposite was actually the case. It took a LOT of sandpaper to sand the blank down to the bushings, and it took a LONG time. Unfortunately, I must have sanded too much in one area, because there was a "rip" in one part of the pen when I was through. It is true that, aside from the rip, the finished pen was pretty cool (my mom wanted the pen even with the rip, as it was purple and, well, she IS my mom), but I did not have a good time making it at all.
I even have another set of acrylic pen blanks drilled and glued (I had bought two originally, and prepared them both), but I have resisted actually making a pen out of them. Maybe someday I will - it would be a bit of a waste not to - but not until I have tried several other experiments and have forgotten (at least a little bit) what the acrylic turning was like.
Saturday, May 26, 2007
Another small tip, and more interesting woodwork
Another tip that I picked up from my woodturning book is to cut the pen blanks as close to the length of the tubes before drilling and gluing. Not only does it keep the woodshop from filling up with useless shavings, it allows me to keep small squares of wood for use in more intricate pens. This does not necessarily increase the quality of the pens, just the possibilities. :-)
I have made attempts at creating a couple of other types of pens. One is the "broker pen", which my father and sister liked so much that I do not have one handy to take a picture of. An example of the broker pen can be found here.
Another type of pen, that I have tried once and am about to try again soon, is a combination pen/pencil. If you twist it to the right, it is a pen, and if you twist to the left it is a pencil. This one was made out of ash:

Another kit that you can get is for a magnifying glass or a letter opener. There are several styles for these, but the one that I have tried (and it came out pretty well) is the Classic American style. This one is a gift for my father-in-law for his birthday. My wife gave him the pen that she made in the pen turning class that we took, and it is of the same wood (Cocobolo):

I have not tried any letter openers yet, but I recently got a kit for one, so it will not be long before I try it.
Tuesday, May 22, 2007
Figuring out the drill press, and other tips
While I have been getting better at the entire process, my unfamiliarity with power tools (and tools in general) rears its ugly head sometimes. For the longest time, I could not figure out why the drill press seemed to drill straight holes (as advertised) that went diagonally through the pen blank instead of straight down the center (a feature not shown in any ads that *I* had ever seen). I even called the manufacturer of the drill press and spoke to their technical support. They had me make sure that the chuck (the part holding the drill bit) was on straight, and that it came down straight onto the table. I thought this would help, and it did help a bit, but I was still experiencing the frustration of not knowing when the holes would drill straight.
With large pen blanks (large in diameter), this is not as much of a problem, but if I ever wanted to do work with smaller blanks, I could drill through the side of the blank instead of out the bottom, and that would be bad.
I was pretty much at my wit's end, since I still did not have success after calling the drill press technical support line, so I went back to the gurus at Woodcraft and one of them said, in kind of an offhand manner, "I assume you have already squared the bit with the press table". I just looked at him, trying to figure out what he meant.
"You mean leveled the table against the chuck?", I said, figuring that had to be what he meant, since that is what the drill press tech said to do.
It turns out that the best way to drill holes straight down is to make sure that the drill bit is at a 90 degree angle to the drill press table. It sounded obvious as soon as he explained it, and I bought a small square to help me make sure of the right angle. Once I "squared up" the table and the bit...voila! Suddenly my holes were pretty straight. The bit will always follow the grain of the wood a bit, but the error was a lot smaller and could be dealt with.
Even with straighter holes, though, there was still an issue with not being able to get the pen tubes into the holes once they were drilled. One tip that seems to work most of the time (we'll see an exception later where it does not help as much, though it never hurts): After the hole is drilled, take the pen blank out of the vise and manually move it up and down the drill bit to clear out any bits that prevented the hole from being straight. It is a bit suggestive, but it works. :-)
Another tip which helped with the final product, that (again) I had not thought about, is the application of a second coat of finish. I had thought that one coat of finish was all that was needed, and indeed the pens came out okay, but a second coat of finish made a big difference!

This, I think, is my best work to date. It is the first pencil in the Classic American style that I put together, and all of the tips mentioned above were used. It is not the only good pen I have made, but it is (hopefully) the first of many great ones.
Subscribe to:
Posts (Atom)