Recently, my mom bought a couple of my pens to give to friends and relatives as birthday presents. One of the recipients liked his so much that he commissioned three more! An unexpected bonus this holiday season.
Last night, I went to the monthly Seacoast Woodturners Club meeting. The topic of the evening was "Segmented Pen Turning". There is a guy there who does wonderful work with segmented bowls and such, and he had put together some pen blanks based on the pieces that he used for one of his bowls. I mentioned that I had been turning some pens this week (see paragraph above), and when no one else volunteered I was asked to turn the pen for the demo, in front of the club!
Now, I have taken part in the turning at the club before, but usually we are turning a bowl, and I am learning much more than I am teaching. Last night, though, I was able to show some of the tips that I had picked up over the last couple of years. I even decided to be daring and start using the skew chisel, which many experienced turners shy away from because of the tearout that can result. The other members seemed impressed that I was able to use the skew without any mistakes. For the first time, I really felt like I was contributing to the meetings of the group. It was a great feeling.
Of course, I have had my setbacks recently too. While making a pen last week, I put the first two parts of the kit together backwards. This made the entire kit unusable, and was something I had never done before. I just wasn't thinking. I have put together dozens of pens, and had never made that mistake. I also put together a beautiful cocobolo Classic American pen, only to find that when it was assembled, the top would not turn. I had a nice-looking non-functional pen-like sculpture. Luckily, THAT one got rescued by Don at Woodcraft and is usable now.
The pen I made at the meeting of the club is a slimline style pen that is tapered at the top, bottom, and middle, and fat otherwise. I have never made a pen with that style - all of the slimline pens I have done have been thin all the way across - and it was very interesting to make. I do not like the finished style as much, but I was given the pen when I finished turning it, and I use it in my home office as a nice reminder of the evening at the club.
Due to other issues around the house this fall, I have not progressed with the ornaments or pepper mills (I had wanted to do another one right after the class) at all, but starting in January I have signed up for another woodturning class, which meets every other week on Thursday nights from January to April. I am really looking forward to it. We will be doing spindle and bowl turning. The class is my holiday present.
Showing posts with label classic american. Show all posts
Showing posts with label classic american. Show all posts
Wednesday, December 17, 2008

Saturday, July 19, 2008
Not much to show, so much to tell!
Where to begin? There is so much going on. I guess I will just reflect in the order that things occur to me:
1. I now have the domain shakeyletree.com registered! When several of my email addresses stopped working due to the interruption of swordmoon.com, I decided to take the plunge and register shakeyletree.com as a site to host my emails and pictures of my finished products from the lathe (and maybe some links too). If you would like to send me an email related to woodturning, you can send it to woodturner at shakeyletree dot com.
2. Partly because I have not been getting email for a while, and partly because I just think it is a cool store, I stopped in to Nuance today, to find out that the pen-and-letter-opener set that I made out of Tigre Caspi sold ten days ago! This is now my second sale through the store...and was such a wonderful, unexpected surprise!
3. Work on the lathe has been uneven - I was recently working on a dyed (orange) Classic American pen that I think could have come out pretty well, but a chunk of it sheared off just before the sanding step. I also noticed that the dyed woods smell a bit like acrylic, which means that I should probably wait for a cool day when I can open the garage door before I work on them again. However, I did make a beautiful magnifier using cocobolo:

Not only did the grain and colour of the wood come out really nicely (due to the wood, really, not to anything I did), but I tried something new. It is kind of hard to tell in these pictures, but I added lines near each end of the wood, as a bit of decoration. They came out even better than I had hoped.
Here is another picture, just concentrating on the stem:
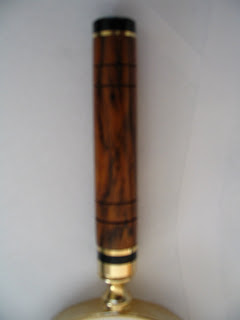
Again, kind of hard to tell, but you can see them a bit. I actually made the lines using a beading tool...I have not yet made any beads with the tool, but as I was playing around with it, I found that it made nice parallel lines in the wood, much like I have heard that wire burning would do.
After it cools off, weatherwise, I hope to work more on pens and such and maybe get a chuck to make some stoppers or a pepper mill or something.
1. I now have the domain shakeyletree.com registered! When several of my email addresses stopped working due to the interruption of swordmoon.com, I decided to take the plunge and register shakeyletree.com as a site to host my emails and pictures of my finished products from the lathe (and maybe some links too). If you would like to send me an email related to woodturning, you can send it to woodturner at shakeyletree dot com.
2. Partly because I have not been getting email for a while, and partly because I just think it is a cool store, I stopped in to Nuance today, to find out that the pen-and-letter-opener set that I made out of Tigre Caspi sold ten days ago! This is now my second sale through the store...and was such a wonderful, unexpected surprise!
3. Work on the lathe has been uneven - I was recently working on a dyed (orange) Classic American pen that I think could have come out pretty well, but a chunk of it sheared off just before the sanding step. I also noticed that the dyed woods smell a bit like acrylic, which means that I should probably wait for a cool day when I can open the garage door before I work on them again. However, I did make a beautiful magnifier using cocobolo:

Not only did the grain and colour of the wood come out really nicely (due to the wood, really, not to anything I did), but I tried something new. It is kind of hard to tell in these pictures, but I added lines near each end of the wood, as a bit of decoration. They came out even better than I had hoped.
Here is another picture, just concentrating on the stem:

Again, kind of hard to tell, but you can see them a bit. I actually made the lines using a beading tool...I have not yet made any beads with the tool, but as I was playing around with it, I found that it made nice parallel lines in the wood, much like I have heard that wire burning would do.
After it cools off, weatherwise, I hope to work more on pens and such and maybe get a chuck to make some stoppers or a pepper mill or something.
Monday, June 9, 2008
Word of mouth
Interesting thing happened today! We were meeting with our financial adviser, and he mentioned that he has been getting a LOT of comments (good ones :-) about the pen that I gave him a while back - a Classic American made with cocobolo. As a result, he is thinking of commissioning me to make some pens. I am not sure whether they will be going to family members, or co-workers, or someone else entirely, but it is a good day when you can
a) Get compliments about something you have made, and
b) possibly get a commission to make more!
Just thought I needed to make a note of a day like this. I do not want to take these types of events for granted.
a) Get compliments about something you have made, and
b) possibly get a commission to make more!
Just thought I needed to make a note of a day like this. I do not want to take these types of events for granted.
Monday, May 19, 2008
Red Letter Day!
After a phenomenal trip through Canada (Ottawa, Toronto, Edmonton, Vancouver, Jasper, and back to Toronto and Ottawa and home), I have been trying to get back into the routine of things. Our summer of events is by no means over, but for a bit the weeks will assume something close to normalcy.
Today I received an email from Evelyn, whose store (Nuance) has my pens for sale. For the first time since she started stocking them, she sold one! I have actually sold a pen in a retail environment! It was a Double Twist Bloodwood pen, with a chrome kit. I will actually get a check for my pen at the end of this month!
I have been talking with Evelyn about perhaps putting together matching pen and letter opener kits. Inspired by today's events, I turned two letter openers and a pen tonight. I already had a bloodwood pen made, so I now have matching sets of bloodwood and Tigre Caspi wood to show to Evelyn, once we make cards for them.
I also have a piece of cocobolo that could become a magnifying glass. That will be good to show to Evelyn too, in case she wants that instead of the opener. To be truthful, the letter opener kits do not strike me as being great, but when matched with a pen they look pretty cool.
There was another cool thing tonight...I mentioned last post that there was a pen that had tubes sticking out of both halves. Well, by gluing in an extra piece of tube, and cutting the blank a certain way, I was able to save the pen. It is the Tigre Caspi pen in the set I spoke of earlier.
Today I received an email from Evelyn, whose store (Nuance) has my pens for sale. For the first time since she started stocking them, she sold one! I have actually sold a pen in a retail environment! It was a Double Twist Bloodwood pen, with a chrome kit. I will actually get a check for my pen at the end of this month!
I have been talking with Evelyn about perhaps putting together matching pen and letter opener kits. Inspired by today's events, I turned two letter openers and a pen tonight. I already had a bloodwood pen made, so I now have matching sets of bloodwood and Tigre Caspi wood to show to Evelyn, once we make cards for them.
I also have a piece of cocobolo that could become a magnifying glass. That will be good to show to Evelyn too, in case she wants that instead of the opener. To be truthful, the letter opener kits do not strike me as being great, but when matched with a pen they look pretty cool.
There was another cool thing tonight...I mentioned last post that there was a pen that had tubes sticking out of both halves. Well, by gluing in an extra piece of tube, and cutting the blank a certain way, I was able to save the pen. It is the Tigre Caspi pen in the set I spoke of earlier.
Sunday, April 13, 2008
Wow...no posts for March?!?
You'd think that I did no woodturning for the entire month...while it was not a HEAVY month for woodturning, I did verify that the drill press was now working much better, and I set up my sharpening system and jigs the way that I wanted them (finally). The sharpening system had not really been set up correctly before. The grinder was not bolted down, so it sometimes would move while I was sharpening the tools, which is bad. Also, the spacing between the grinder and the jigs on either side was not optimal either, so I really could only use one side of the grinder at a time.
New wood: I picked up some great cocobolo (not that I needed more, but they got a new shipment at Woodcraft and it was too good to pass up). I also picked up some cheap bird's-eye maple and some burl that looked cool. Yesterday Woodcraft had a 15% off sale, and I took advantage of it. I got some new kits (magnifying glass, letter opener, key ring) and even got a new Spindlemaster tool and a couple of neat books.
A couple of weeks ago I stopped in to Nuance to talk to the owner there. I mentioned possibly doing letter openers and magnifying glasses and such, and she seemed very interested. So, I may do a couple of Classic American sets - either pen and magnifier or pen and letter opener. One set in bloodwood or maple, and one set in cocobolo.
I also got some dyed blanks yesterday. They seem to come out pretty well. I think I am set for wood for a good long while now (yeah, right).
Something I also learned yesterday, that gave me hope for doing wine stoppers and such: The reason why the chuck may be slipping out of the headstock is that the headstock may be dirty. If I clean out the headstock, and clean the taper on the chuck, then it may fit together correctly. It is worth a shot, and gives me hope, as I said. Maybe I can start doing eggs and winestoppers soon.
New wood: I picked up some great cocobolo (not that I needed more, but they got a new shipment at Woodcraft and it was too good to pass up). I also picked up some cheap bird's-eye maple and some burl that looked cool. Yesterday Woodcraft had a 15% off sale, and I took advantage of it. I got some new kits (magnifying glass, letter opener, key ring) and even got a new Spindlemaster tool and a couple of neat books.
A couple of weeks ago I stopped in to Nuance to talk to the owner there. I mentioned possibly doing letter openers and magnifying glasses and such, and she seemed very interested. So, I may do a couple of Classic American sets - either pen and magnifier or pen and letter opener. One set in bloodwood or maple, and one set in cocobolo.
I also got some dyed blanks yesterday. They seem to come out pretty well. I think I am set for wood for a good long while now (yeah, right).
Something I also learned yesterday, that gave me hope for doing wine stoppers and such: The reason why the chuck may be slipping out of the headstock is that the headstock may be dirty. If I clean out the headstock, and clean the taper on the chuck, then it may fit together correctly. It is worth a shot, and gives me hope, as I said. Maybe I can start doing eggs and winestoppers soon.
Tuesday, February 19, 2008
Shakey Le Tree on display
This morning, I visited Nuance, the store where Shakey Le Tree pens are now on sale. The display looks great - the pens are nicely laid out behind a glass case:

Close-up of the card at the top of the display:

Close-up of one of the pens on display:

I was really happy with the display...if they do not sell, it will not be because of a lack of effort.
I made another nice one tonight - a Cocobolo Classic American pen. I think I will be working with Cocobolo for a while...I have some great pieces that are only really good for pens (and maybe jewelry, if I can figure out how to make it), and it would be a shame not to use them. Cocobolo also always comes out unique.
I also made a mistake on a pen tonight...I was making an Olivewood Broker pen, and I got some tearout and had to start over. I lost the wood, but kept the tube, so I should be able to make another Broker pen with another piece of Olivewood.
I got back my sharpened roughing gouge on Sunday, and used it tonight for the first time. What a difference! I learned a bit about sharpening, too. The angle of the sharpening wheel changes as the tool gets sharpened multiple times, as the sharpener actually shortens the tool. So, even though I had set up the right angle for the sharpening wheel when I first set it up, I needed to change it occasionally, and I had not done that. Also, I was told that I needed to sharpen longer on the sides of the tool than I had been. I will see if I can do that successfully.

Close-up of the card at the top of the display:

Close-up of one of the pens on display:

I was really happy with the display...if they do not sell, it will not be because of a lack of effort.
I made another nice one tonight - a Cocobolo Classic American pen. I think I will be working with Cocobolo for a while...I have some great pieces that are only really good for pens (and maybe jewelry, if I can figure out how to make it), and it would be a shame not to use them. Cocobolo also always comes out unique.
I also made a mistake on a pen tonight...I was making an Olivewood Broker pen, and I got some tearout and had to start over. I lost the wood, but kept the tube, so I should be able to make another Broker pen with another piece of Olivewood.
I got back my sharpened roughing gouge on Sunday, and used it tonight for the first time. What a difference! I learned a bit about sharpening, too. The angle of the sharpening wheel changes as the tool gets sharpened multiple times, as the sharpener actually shortens the tool. So, even though I had set up the right angle for the sharpening wheel when I first set it up, I needed to change it occasionally, and I had not done that. Also, I was told that I needed to sharpen longer on the sides of the tool than I had been. I will see if I can do that successfully.
Thursday, February 14, 2008
Another milestone...
This is just a quick post, because I have to make a note of what happened today. On Monday, I received an email from someone who went into the downtown Dover store where I might soon be selling my pens. He told me that he spoke with Evelyn, and he was looking for a pen as a gift to a friend, and she gave him my contact info.
Well, this morning he showed up and bought one of the pens, a maple burl Classic American pen. It is the first pen I have ever sold to someone whom I did not know! Shakey Le Tree Designs lives and breathes, apparently.
In other news, I have severely messed up the sharpening of my roughing gouge, so I took it in to Woodcraft on the way back from Burlington on Tuesday. Don is taking it home to sharpen it, and I will get it back from him at Woodcraft on Saturday, as that is the next day that he is working there. So, no pen making until the weekend.
In the meantime, my lovely wife is helping me to create a web site for Shakey Le Tree that will just showcase the current stock and other items that I have made. It will not give the back story that I give here, about the mistakes that I make along the way. :-)
Speaking of which, I still do make mistakes - I just tend to catch them earlier. For instance, I recently attempted a pink ivory twist pen, but I did not sand it enough before polishing, and the pink ivory had lots of little pock marks (they were smooth, but visible). So, I am going to start over with that instead of making a pen from it. That way, I save the tubes and the kit, and only the wood is lost.
Income: $40
Well, this morning he showed up and bought one of the pens, a maple burl Classic American pen. It is the first pen I have ever sold to someone whom I did not know! Shakey Le Tree Designs lives and breathes, apparently.
In other news, I have severely messed up the sharpening of my roughing gouge, so I took it in to Woodcraft on the way back from Burlington on Tuesday. Don is taking it home to sharpen it, and I will get it back from him at Woodcraft on Saturday, as that is the next day that he is working there. So, no pen making until the weekend.
In the meantime, my lovely wife is helping me to create a web site for Shakey Le Tree that will just showcase the current stock and other items that I have made. It will not give the back story that I give here, about the mistakes that I make along the way. :-)
Speaking of which, I still do make mistakes - I just tend to catch them earlier. For instance, I recently attempted a pink ivory twist pen, but I did not sand it enough before polishing, and the pink ivory had lots of little pock marks (they were smooth, but visible). So, I am going to start over with that instead of making a pen from it. That way, I save the tubes and the kit, and only the wood is lost.
Income: $40
Friday, January 25, 2008
A trip to Wall Street to see a broker
My goodness, I seem to be making a lot of financial-related pen types! I made my first two Wall Street pens a couple of days ago, one of cocobolo and one of pink ivory. I think they came out pretty well, even though they seem small to me. I do have large hands, though, and others have said that they like them:

The strange thing about these type of pens is that they are mostly the kit. For most of the other pens I have made, the wood (or acrylic) takes up the large majority of the length of the pen. With the Wall Street pens, the kit takes up about half of the length, which makes for a much different look.
I also made a cocobolo broker pen, which came out okay, and a maple burl (undyed, this time) Classic American pen. I was also making a Bocote twist pen, but the wood split on me, so I will make a chrome twist pen with bloodwood instead.
Here is the maple burl pen:


The strange thing about these type of pens is that they are mostly the kit. For most of the other pens I have made, the wood (or acrylic) takes up the large majority of the length of the pen. With the Wall Street pens, the kit takes up about half of the length, which makes for a much different look.
I also made a cocobolo broker pen, which came out okay, and a maple burl (undyed, this time) Classic American pen. I was also making a Bocote twist pen, but the wood split on me, so I will make a chrome twist pen with bloodwood instead.
Here is the maple burl pen:

Sunday, January 20, 2008
First Adventures with Dyed Burl Pens
Well, I finally got the wood shop set up the way I want it, I think. We put together the new lathe stand, and arranged the shop so that the machines are standing in roughly the order in which they are used. I have my kits and blanks on a table, and on the other side of the shop I have the band saw and the drill press and the lathe, in that order. I do the gluing on the table that has the blanks on it, and I press the pens together on that table as well.
With the help of my wife, I found a nifty way to keep track of all of my pen kits. Originally, I was going to use empty soup cans to hold the kits and bushings and such, but she found a shoe bag that works perfectly. It has 24 pockets (normally for holding 12 pairs of shoes), which gives me a chance to put 24 different types of kits in there. I don't have that many, but perhaps someday I will.
Now that I can see all of the blanks that I have, and can keep track of my kits, I am starting to make some nifty pens. I decided to start using some of the cool blanks that I bought last year, now that I have some confidence that the pens will come out well. I started the new year by working with two blanks of dyed burl that I bought in Canada.
I have never worked with burl before, and until now, I had no idea that it was that different from working with other types of wood. However, I quickly found that burl has a few quirks - some of which are good. It drills VERY straight - a hole drilled from the center of one side of the blank has a good chance of coming out in the center of the other side. However, it does this because it is extremely hard wood. So, when it is being drilled, the heat builds up very quickly. I had to spray the drill bit quite a few times to cool it down.
The dyed burls apparently (note - I have now worked with two of them, which I know is a very small sample size, but I can only go from my own experience) are difficult to get the tubes into even though the holes are straight. There seem to be catches on the inside of the blank (not sure how the dye plays into that, but the undyed burl that I worked with tonight did not have this problem), and I actually had to file down the inside of the blank and enlarge the holes a bit to get the tubes to glue into them.
I decided to do two Classic American style pens with the dyed burl (the dye in this case is a blue-green, which contrasts interestingly with the natural brown of the burl) - one with a gold kit (from Woodcraft) and one with a chrome kit (from Lee Valley, in Ottawa). Interestingly, though the kits look pretty much the same, there are some differences in the assembly and turning instructions. For instance, with the Lee Valley kits, you part off 3/16" instead of 1/8". I actually parted off 3/16" for both pens, and there is no real problem, but the gold pen does look slightly different from the other Woodcraft CA pens that I have made.
When turning the chrome pen, I got some tearout in the bottom barrel - I could see the brass tube through a hole in the wood. In the past, I would have parted off the rest of the wood and called it a lost cause - maybe using the top barrel as part of a hybrid pen later. However, I decided to see if I could fix it. I put a mixture of medium CA glue and the shavings from the burl (which were all over the lathe) into the hole, and let the glue set. Then, I sanded it down to the level of the rest of the barrel. For some wood, this would not work because you would be able to see where the grain was messed up, but because of the varied nature of the burl, this technique worked like a charm. The pen was saved, and there is no way to tell where the patch was placed unless you know to look for it - and even then it is tough.
Here is the chrome pen - the gold pen looks very similar, but of course the fittings and trim are gold where this one is silver:

This has GOT to be one of the coolest-looking pens I have made out of wood. One interesting thing about working with the dyed burl that was NOT so great: When I was turning it, it was almost like working with acrylic. Instead of smelling wood, like when I work with cocobolo or bloodwood, I was smelling the dye. It was not quite as bad as acrylic, but it reminded me that if I am going to work with acrylics again (and I do have quite a few neat acrylic blanks), I should probably wait until the weather gets warmer and I can work with the garage door open.
Tonight I cut and glued the start of six pens - Classic American Maple Burl (undyed), Slimline Maple Burl (undyed), Classic American Bocote (Chrome kit), Pink Ivory Wall Street II (A style that uses one short piece of wood, which is good for a lot of the pieces I have left over from other pens. I have not made any of these before), Cocobolo Wall Street II, Cocobolo Broker Pen. Lots of different bushings and drill bits involved with these. On one of them, I messed up the gluing, and had to cut the tube in half and put the cut half into the other side of the blank. It should still work okay.
I do eventually want to start in on winestoppers and the egg kaleidascope, but I am really enjoying seeing how the more interesting blanks come out when they are turned.
With the help of my wife, I found a nifty way to keep track of all of my pen kits. Originally, I was going to use empty soup cans to hold the kits and bushings and such, but she found a shoe bag that works perfectly. It has 24 pockets (normally for holding 12 pairs of shoes), which gives me a chance to put 24 different types of kits in there. I don't have that many, but perhaps someday I will.
Now that I can see all of the blanks that I have, and can keep track of my kits, I am starting to make some nifty pens. I decided to start using some of the cool blanks that I bought last year, now that I have some confidence that the pens will come out well. I started the new year by working with two blanks of dyed burl that I bought in Canada.
I have never worked with burl before, and until now, I had no idea that it was that different from working with other types of wood. However, I quickly found that burl has a few quirks - some of which are good. It drills VERY straight - a hole drilled from the center of one side of the blank has a good chance of coming out in the center of the other side. However, it does this because it is extremely hard wood. So, when it is being drilled, the heat builds up very quickly. I had to spray the drill bit quite a few times to cool it down.
The dyed burls apparently (note - I have now worked with two of them, which I know is a very small sample size, but I can only go from my own experience) are difficult to get the tubes into even though the holes are straight. There seem to be catches on the inside of the blank (not sure how the dye plays into that, but the undyed burl that I worked with tonight did not have this problem), and I actually had to file down the inside of the blank and enlarge the holes a bit to get the tubes to glue into them.
I decided to do two Classic American style pens with the dyed burl (the dye in this case is a blue-green, which contrasts interestingly with the natural brown of the burl) - one with a gold kit (from Woodcraft) and one with a chrome kit (from Lee Valley, in Ottawa). Interestingly, though the kits look pretty much the same, there are some differences in the assembly and turning instructions. For instance, with the Lee Valley kits, you part off 3/16" instead of 1/8". I actually parted off 3/16" for both pens, and there is no real problem, but the gold pen does look slightly different from the other Woodcraft CA pens that I have made.
When turning the chrome pen, I got some tearout in the bottom barrel - I could see the brass tube through a hole in the wood. In the past, I would have parted off the rest of the wood and called it a lost cause - maybe using the top barrel as part of a hybrid pen later. However, I decided to see if I could fix it. I put a mixture of medium CA glue and the shavings from the burl (which were all over the lathe) into the hole, and let the glue set. Then, I sanded it down to the level of the rest of the barrel. For some wood, this would not work because you would be able to see where the grain was messed up, but because of the varied nature of the burl, this technique worked like a charm. The pen was saved, and there is no way to tell where the patch was placed unless you know to look for it - and even then it is tough.
Here is the chrome pen - the gold pen looks very similar, but of course the fittings and trim are gold where this one is silver:

This has GOT to be one of the coolest-looking pens I have made out of wood. One interesting thing about working with the dyed burl that was NOT so great: When I was turning it, it was almost like working with acrylic. Instead of smelling wood, like when I work with cocobolo or bloodwood, I was smelling the dye. It was not quite as bad as acrylic, but it reminded me that if I am going to work with acrylics again (and I do have quite a few neat acrylic blanks), I should probably wait until the weather gets warmer and I can work with the garage door open.
Tonight I cut and glued the start of six pens - Classic American Maple Burl (undyed), Slimline Maple Burl (undyed), Classic American Bocote (Chrome kit), Pink Ivory Wall Street II (A style that uses one short piece of wood, which is good for a lot of the pieces I have left over from other pens. I have not made any of these before), Cocobolo Wall Street II, Cocobolo Broker Pen. Lots of different bushings and drill bits involved with these. On one of them, I messed up the gluing, and had to cut the tube in half and put the cut half into the other side of the blank. It should still work okay.
I do eventually want to start in on winestoppers and the egg kaleidascope, but I am really enjoying seeing how the more interesting blanks come out when they are turned.
Wednesday, September 26, 2007
Budgetary Concerns
As one may expect, I have not exactly stayed away from Woodcraft just because I have not been blogging. :-)
Recent purchases fall into two categories: upgrades to the workshop environment, and pen materials. I bought a sturdy wooden stand for my drill press, since the existing bench top was not really working. I also bought an assortment of clamps that I had my eye on, since they were $5 off. I bought a woodturning book, and a Pink Ivory pen blank, and two pen kits. The pen kits were a titanium Classic American kit, which is more expensive but may look really nice with bloodwood or acrylic; and a satin pearl slimline pencil kit, which was commissioned by a co-worker who liked the pen that I made a while back and wanted a pencil like it. I also bought a new pen mandrel, since I noticed that the old one was acting a bit warped (more on that later).
Expenses: $91.15
Totals:
Out-of-pocket: $169.93, Total: $229.93
Recent purchases fall into two categories: upgrades to the workshop environment, and pen materials. I bought a sturdy wooden stand for my drill press, since the existing bench top was not really working. I also bought an assortment of clamps that I had my eye on, since they were $5 off. I bought a woodturning book, and a Pink Ivory pen blank, and two pen kits. The pen kits were a titanium Classic American kit, which is more expensive but may look really nice with bloodwood or acrylic; and a satin pearl slimline pencil kit, which was commissioned by a co-worker who liked the pen that I made a while back and wanted a pencil like it. I also bought a new pen mandrel, since I noticed that the old one was acting a bit warped (more on that later).
Expenses: $91.15
Totals:
Out-of-pocket: $169.93, Total: $229.93
Saturday, August 11, 2007
Learning, always learning...
Well, last night was a very mixed bag. For everything that went right, I had to learn something from something that went wrong. It started with working on a Tulipwood Classic American pen. The pen itself came out pretty well, but even though I paid particular attention to getting the wood flush with the bushings, the end result was not flush with the kit on the upper barrel. I think (I will have to confirm this later) that the bushings themselves have gotten sanded down a bit, so making the wood flush with the bushings will make it slightly below where it should be for the finished product. I have no problem getting a new set of bushings if that is the case. If that is NOT the case, I have no clue what is going on.
While putting together the CA pen, I learned how (for the first time) to use the file that I bought recently. The fit between the upper and lower barrels was very tight (and it is supposed to be fairly loose). The recommended way to handle this is to file down the inside of the upper barrel. I had never done this before, but it worked pretty well when I did it for the first time.
Then I went to work on a Tulipwood click pen. This one was one that I was trying to resurrect, as the tube had gotten stuck in the blank during the gluing process. So, I cut off the tube part that was outside the blank, and glued it into the other side. This seemed to work fine, until the part where I was assembling the pen. I made the bad decision to use the "short tube" part as the part of the upper barrel that was nearest the center. When I pressed a part of the kit into this end of the tube, the short piece of tube came unglued. So, I tried to reglue the tube into the upper barrel, and then press the pen together, and the wood split. So, 1 for 2 so far, for those counting at home.
The tiebreaker would be a cocobolo slimline pen. This pen worked fine all the way to the last part of putting the pen together. At that point (as had happened with an olivewood slimline pen a while back), the glue holding the upper tube inside the upper barrel came loose, and the tube came out. I decided to use the thin fast-acting glue to put the tube back into the barrel, and the tube got stuck halfway in. So, I have a ridiculous-looking approximation of a slimline pen.
1 for 3 on the night, and even the 1 had issues. Hopefully I will be able to come up with some quality work soon.
While putting together the CA pen, I learned how (for the first time) to use the file that I bought recently. The fit between the upper and lower barrels was very tight (and it is supposed to be fairly loose). The recommended way to handle this is to file down the inside of the upper barrel. I had never done this before, but it worked pretty well when I did it for the first time.
Then I went to work on a Tulipwood click pen. This one was one that I was trying to resurrect, as the tube had gotten stuck in the blank during the gluing process. So, I cut off the tube part that was outside the blank, and glued it into the other side. This seemed to work fine, until the part where I was assembling the pen. I made the bad decision to use the "short tube" part as the part of the upper barrel that was nearest the center. When I pressed a part of the kit into this end of the tube, the short piece of tube came unglued. So, I tried to reglue the tube into the upper barrel, and then press the pen together, and the wood split. So, 1 for 2 so far, for those counting at home.
The tiebreaker would be a cocobolo slimline pen. This pen worked fine all the way to the last part of putting the pen together. At that point (as had happened with an olivewood slimline pen a while back), the glue holding the upper tube inside the upper barrel came loose, and the tube came out. I decided to use the thin fast-acting glue to put the tube back into the barrel, and the tube got stuck halfway in. So, I have a ridiculous-looking approximation of a slimline pen.
1 for 3 on the night, and even the 1 had issues. Hopefully I will be able to come up with some quality work soon.
Thursday, August 9, 2007
Working with Tulipwood
Tonight (and last night) I have been gluing and trimming the pens that I have going, i.e. 2 tulipwood click pens, 2 tulipwood CA pens, and one cocobolo slimline pen. Tulipwood seems to be a very hard wood - the barrel trimmer has a tough time with it. At the same time, it seems to act like cocobolo when I try to glue a tube into it, i.e. getting the tube stuck. One of the tubes got stuck, and I used the band saw to cut the tube and re-glue it into the other end, but I am not convinced that it will come out correctly, since I think it will make the resulting blank too long. Maybe, if I am careful, I can salvage it.
I still have not turned the tulipwood on the lathe, but it looks like it COULD come out very nicely. I will probably make one or more of the pens this weekend.
I still have not turned the tulipwood on the lathe, but it looks like it COULD come out very nicely. I will probably make one or more of the pens this weekend.
Wednesday, July 4, 2007
The secret is out
Yesterday, we had a great visit from my brother and his girlfriend, and at long last my brother was made aware of what I have been doing these last several months. It was kind of fun to wait until I had some real successes to show him, and to keep him in the dark until now. He seemed to like the Bocote pen/pencil set, and also seemed kinda surprised that his little brother could be doing all of this stuff with machine tools. His girlfriend seemed to like her pen too (the Olivewood pen with the organic citrus wood polish). All in all, a good time was had.
Today I will present the acrylic pen to the hostess of our July 4th gathering. That should be fun too. This weekend, I will make more of the olivewood pens and maybe a bloodwood Classic American. I need to think of what kind of pens I will make next. Maybe more slimlines and regular CA pens...or maybe I will try a segmented pen of some kind. If I can find a blue wood (or even a blue acrylic, though it would be harder to work with), I could combine it with bloodwood and holly to make a red, white and blue pen. That might be cool.
Today I will present the acrylic pen to the hostess of our July 4th gathering. That should be fun too. This weekend, I will make more of the olivewood pens and maybe a bloodwood Classic American. I need to think of what kind of pens I will make next. Maybe more slimlines and regular CA pens...or maybe I will try a segmented pen of some kind. If I can find a blue wood (or even a blue acrylic, though it would be harder to work with), I could combine it with bloodwood and holly to make a red, white and blue pen. That might be cool.
Subscribe to:
Posts (Atom)